If you have spent any time browsing the galleries of vintage processors and mainframe modules here on CPU Hall, you might wonder how these shots are actually taken. The truth involves a lot of trial, error, and a surprising amount of lower back pain. Documenting hundreds of chips means taking thousands upon thousands of photos. It is a labor of love that absolutely destroys your posture.
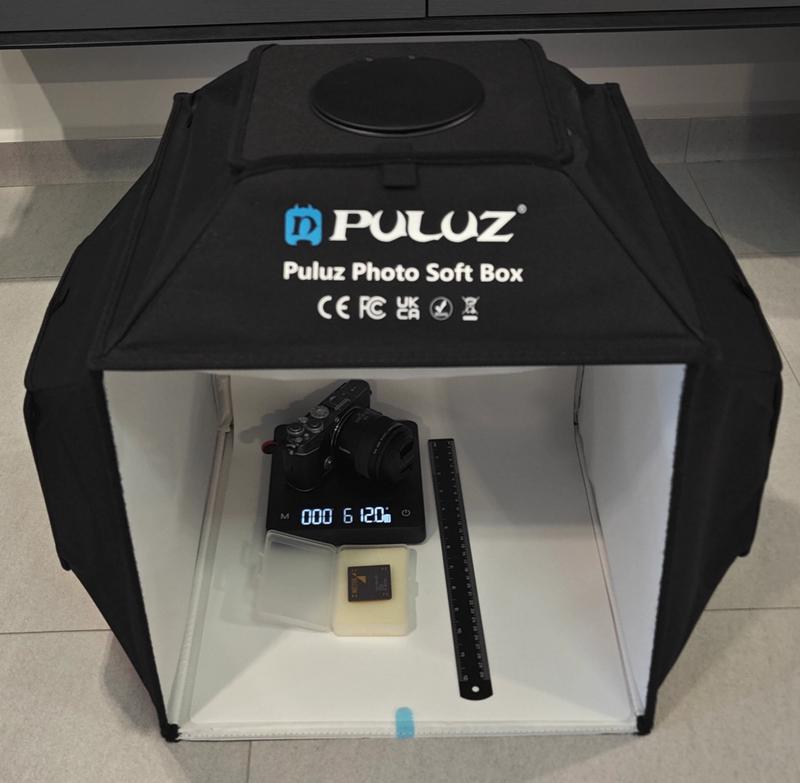
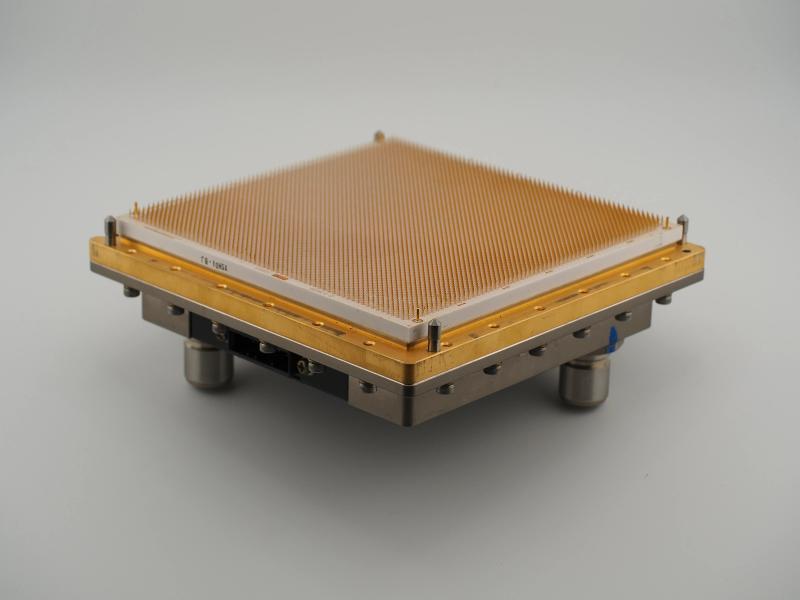
Space is a premium here in Singapore, so I do not have a massive, permanent studio setup. My approach is incredibly pragmatic. The core of the operation is a controlled product photography lightbox I grabbed cheaply off Taobao. It gets the job done perfectly. Inside that box, the stage is set with a few crucial props. I use a long black matte ruler because it does not reflect light back into the lens and ruin the contrast. Next to it sits a digital weighing scale that measures from a precise 0.1g all the way up to 5kg. That high weight limit is absolutely necessary when you are dealing with chunky, historically significant Big Iron hardware like heavy IBM thermal conduction modules or Amdahl MCCs.
For the actual shooting, I rely on my Micro Four Thirds gear. I use an Olympus E-P7 paired with a Panasonic Leica DG 45mm Elmarit macro lens. I always set the lens to full focus with its optical stabilisation turned off. Instead, I rely entirely on the E-P7's incredible in-body image stabilisation. Why? Because every single shot you see on this site is taken handheld.
Taking photos of these artifacts is a highly methodological process. I follow a strict routine to make sure every chip is documented consistently.
Step one is the top-down perspective. I shoot directly through the top hole of the Puluz softbox, hovering about 55cm above the base. I capture the artifact on the scale, then I take a shot of it with the ruler beside it. If the chip is not perfectly square, I rotate it 90 degrees and shoot it with the ruler again. Then I take a clean top-down shot of the artifact alone, followed by flipping it over to capture the underside pins or gold pads.
From there, it is all about the angles. I move the camera down to about 20 degrees from the top to capture both the surface and the flipped underside. Then I drop to 45 degrees, then 65 degrees, and finally I get the camera practically touching the floor for an 80 to 85-degree low profile shot.

After the structural documentation is out of the way, I move in for the macro details. This is where I play with the lighting and angles to reveal faint inscriptions, manufacturing codes, or unique architectural markings that are otherwise invisible to the naked eye. Finally, I usually take a few stylistic shots just for the fun of it.
This rigid methodology sounds great on paper. In practice, doing it handheld while contorting around a lightbox for hours is a guaranteed trip to the chiropractor. My back aches just thinking about the backlog of silicon waiting to be archived.

The worst part of this journey has definitely been the learning curve. When I first started out, my technique was unrefined. As my skills improved and I gained better insights into how light interacts with ceramic and gold, I would look back at my older photos and realize they simply did not make the cut. There is a special kind of agony in realizing you need to pull hundreds of CPUs out of safe storage to completely re-shoot them. It is a painful rite of passage for any serious archivist.
Since I am an amateur when it comes to editing, I keep the digital darkroom work as simple as possible. I use the stock OM Workspace software. I apply just a tiny bit of sharpening and use the OM 'Vibrant' color profile. It honestly looks the best and keeps the metallic tones highly color accurate. I also lock the white balance to a cool 5500K for absolute consistency across the entire database.

Finally, the files are downsized to a manageable 3200x2400 resolution. I apply a very light watermark (you really have to squint to see it) and compress everything to 85% WEBP format. This keeps the website fast and snappy without sacrificing the visual fidelity of the hardware.
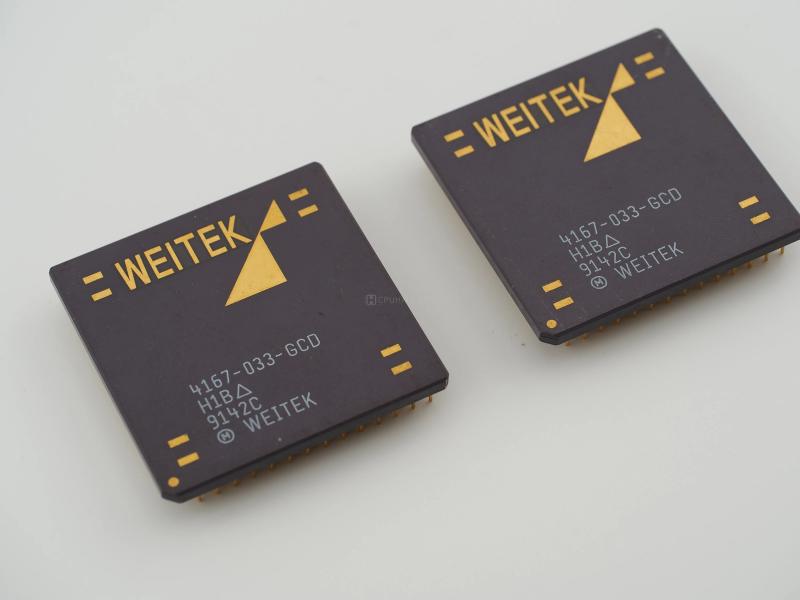
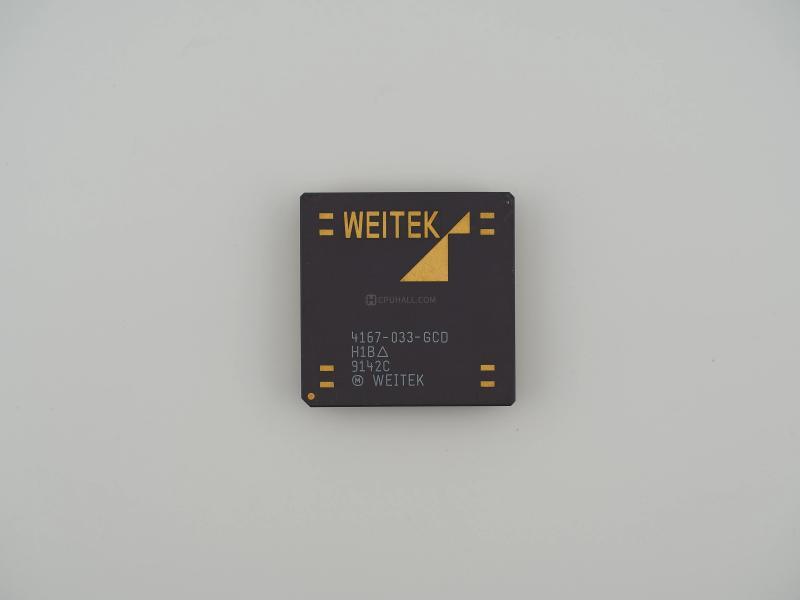
It is a tedious, back-breaking process. But when a macro shot perfectly captures the intricate traces of a Weitek coprocessor or a rare piece of mainframe history, it makes all the physical effort completely worthwhile.
Before I wrap this up, we need to talk about the true unsung hero of this entire operation. When you are dealing with thousands of photos across hundreds of different processors, a massive dump folder on your hard drive is a recipe for absolute disaster.
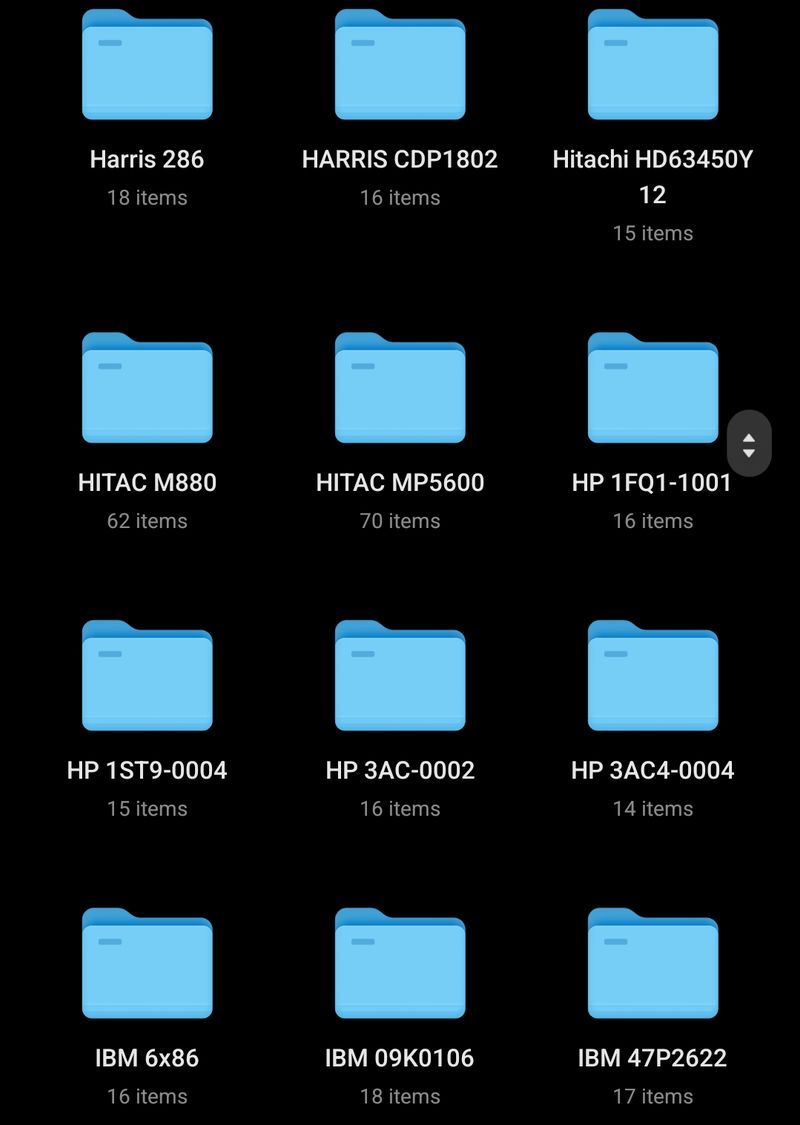
My golden rule for digital housekeeping is strictly enforced. Every single chip gets its own dedicated, specifically named folder right from the moment the SD card hits the computer. For example, the moment I finish photographing a Weitek 4167, a new folder is born just for it. That folder houses all the top down perspectives, the angled profiles, and the macro shots for that specific piece of silicon. Keeping everything compartmentalized like this saves me hours of headache when it is time to build out a new database entry for the website.
If reading about my backaches and strict shooting routines makes you want to document your own vintage hardware collection, do not let the talk of macro lenses and lightboxes intimidate you. You absolutely do not need dedicated camera gear to get started.
Honestly, the most powerful setup you can have right now is probably sitting in your pocket. The camera technology packed into modern smartphones has become outrageously good, especially their computational software for close up details. You do not even need a softbox. Find a spot near a window with some bright, diffused morning sunlight. Set your chip down on a clean piece of paper, hold your phone steady, and take the shot.
You will be genuinely surprised by the incredible, museum quality results you can pull off with nothing but a phone and the sun. The most important part of hardware preservation is not the gear you use. It is simply making the decision to start archiving the history sitting right in your hands.